.png)
Invite more people
Add seats if you need them, send invites, and check that each person can open their card.
Before you invite
An invite spends a seat the moment you send it, so check you have seats before you send. Brand can wait. Company look and shared modules pull through to cards that already exist, so nobody has to rebuild a card if you set the brand later.
Worth doing first
- Decide whether people may change their own template and colours
- Collect work email addresses, not personal ones
- Know who needs admin access and who does not
1. Check your seats
Open Company Dashboard, then People. The row of tiles across the top is the whole seat picture. Read it left to right before you send anything.
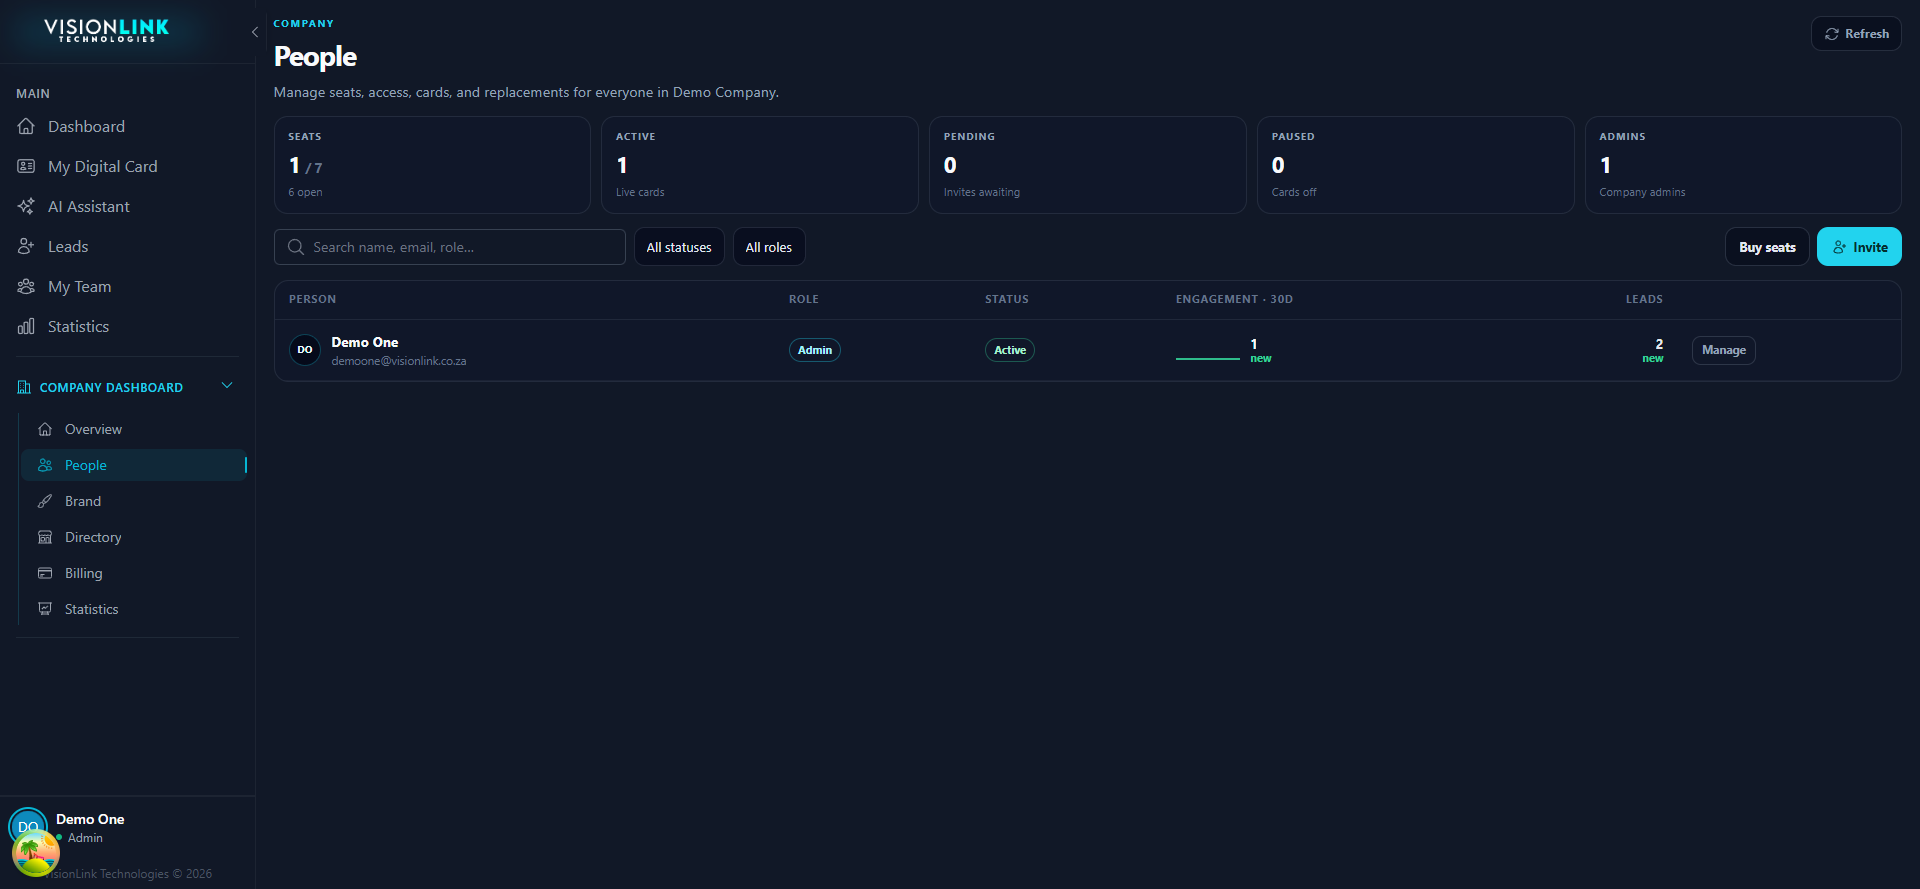
- Seats
- Used against bought. The second number is your cap.
- Active
- People with a live card that visitors can open.
- Pending
- Invites sent but not accepted. These still hold a seat.
- Paused
- Cards switched off. They keep the seat until you free it.
- Admins
- People who can reach Company Dashboard and billing.
What each tile means
2. Send the invites
Click Invite. You can paste a whole list at once, one address per line or comma separated, so a department does not need twenty separate invites.
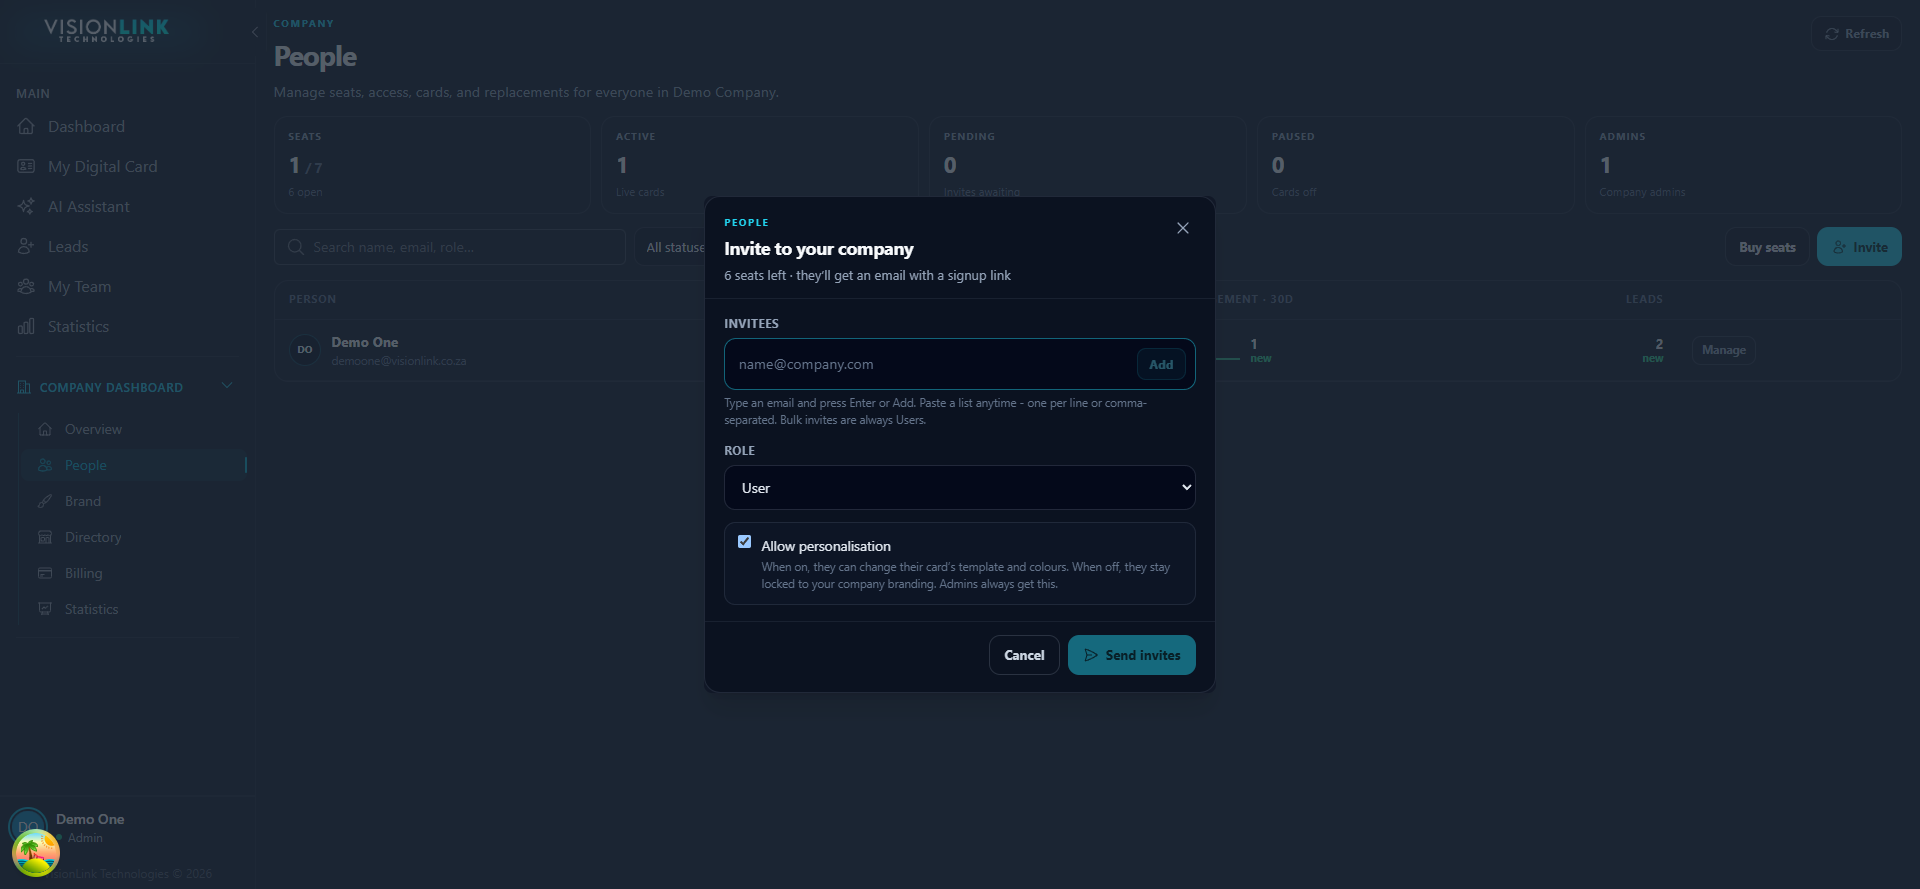
Add the addresses
Type an email and press Enter, or paste a list. Each one becomes a chip you can remove before sending.
Pick the role
User for most people. Admin only for someone who should see billing and manage everyone else.
Decide on personalisation
Leave Allow personalisation on and people can change their own template and colours. Turn it off and they stay locked to your brand.
Send invites
Each person gets an email with a signup link. The seat moves from open to pending straight away.
3. Choose roles deliberately
Role is the one setting people notice later. It controls what appears in their sidebar, not what their public card looks like.
- User
- Their own card, leads, statistics, and the team leaderboard. No Company Dashboard.
- Admin
- Everything a User sees, plus People, Brand, Directory, Billing, and company statistics.
Admin versus User
4. What happens on their side
The invite email carries a signup link tied to their address. Following it creates their account inside your company and drops them on their own empty card, not yours.
They set a password
The signup link handles the account. There is nothing for you to create on their behalf.
They land on their card
Photo, name, title, bio, links. Point them at Set up a basic card and they are done in ten minutes.
Their status flips to Active
Refresh People. Pending drops by one and Active goes up by one.
5. Chase the stragglers
A week later some invites will still read Pending. Almost always the email was filtered rather than ignored.
Resend from the row
Find the pending person in the table and resend. This issues a fresh link and invalidates the old one.
Check the address
A typo in the domain fails silently. Cancel the invite, correct it, and send again rather than resending into the void.
Send a reset instead
If they say they already signed up but cannot get in, open the person and send a password reset from People.
6. When someone leaves
Do not delete a card the day someone resigns. Their QR is printed on things you cannot recall, and a dead link is worse than a redirected one.
- Pause
- Card goes dark, seat stays yours. Use it while you decide.
- Replace
- Same seat, new person. The old card stops and the new hire gets an invite.
- Leave it
- Only if the role is genuinely being retired and the seat is going back to billing.
Pick the right action